- info@ems-ltd.com
- 0118 9817391
Home > PR > Measuring in all three dimensions
Measuring in all three dimensions
30/08/2023 - Micromotors driving 3D measurement systems
30th August 2023
Filed under:
Ems, Faulhaber, Encoder

“Quality means doing it right when no-one is looking,” said industrialist and Ford Motor founder Henry Ford. Quality assurance and verification are important steps in any production process, but how can we carry out these inspections? 3D measurement technologies are one such approach to getting a closer look at individual products as Stewart Goulding, Managing Director at DC motor supplier EMS explains.
In any manufacturing process, it’s crucial to ensure that the final product has been produced to its specification and to the desired quality. Any discrepancies in shape or surface metrology may negatively affect the way the product functions, as well as its efficiency and fit.
Visual inspections performed by a human or a camera robot may be sufficient for some manufacturing processes. But there are certain applications where inspections must be more comprehensive. One such example is the automotive sector. Gears, crankshafts and engine blocks must be tested thoroughly to ensure component integrity and that pieces will fit as desired with the rest of the car’s components.
Achieving this detailed view and examination is possible using 3D measurement technologies. A variety of techniques are available, which can be loosely split into two types — contact and non-contact.
Non-contact
Optical 3D scanning methods are a popular method of non-contact measurement. These offer protection for fragile surfaces that may otherwise be easily damaged by contact methods.
Typically performed using laser scanner or fringe projection systems, optical scans can measure thousands of points per second for a quick, complete scan of the finished product. The digital nature of optical method scanning combined with its speed makes it ideal for integration within highly automated manufacturing processes.
But not all products are best suited to optical methods. Items made from materials with reflective or translucent properties, like glass or synthetic resin, can be difficult to measure using light-based methods. While coating sprays are available to allow optical-based measurements, applying and removing this layer can create unwanted additional steps in the manufacturing process.
Contact
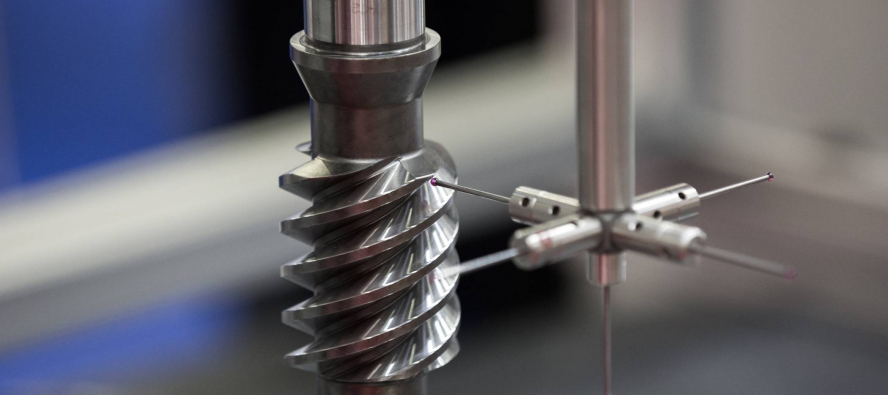
An alternative option is to use a coordinate measuring machine (CMM). Generally regarded as the most accurate form of 3D measurement, these machines can take readings with a tolerance of just one micron, making them ideal for applications where high precision is of utmost priority.
CMMs rely on a probe or stylus with a ball-shaped measuring tip that is positioned onto mapped reference points on the test object. A controller detects this contact to determine the precise shape of the object. It’s possible to manipulate the arm of the probe not only around the object, but also within it for access to cavities that would be difficult to access via an alternative method.
However, there are some disadvantages when it comes to using CMMs. This includes the long measurement time caused by the need to physically move the probe across and around the product. There is also the problem of reference points. CMMs typically measure on several pre-set reference points or along a single line, highlighting specific areas of interest rather than the whole product.
Combination methods
So, how can we maintain the high quality of CMM data, while achieving the speed of an optical-based method? This is where combination or multisensor methods come into play. By using a traditional CMM machine alongside an optical technique like laser scanning, manufacturers can make the best of both approaches.
Whichever method is used for imaging, it’s clear that they all rely on one thing — the accurate positioning of the sensor elements. Whether it’s rotating the arm of the CMM or directing a fine laser, all this positioning can be done using a drive system.
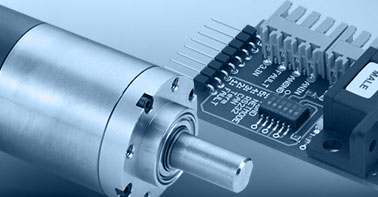
When selecting a drive system for such applications, it’s crucial that the precision of these small DC motors is on par with what the final measurement technology is expected to deliver. This includes the use of encoders, which can generate position signals based on the motor shaft rotation or linear movement. Crucial to allowing achieving precise positioning, these also allow for closed loop control of the motor.
Manufacturers face constant pressure to always maintain high product quality. And while it’s sometimes possible to verify product standard by eye, making use of 3D technologies offers a far more detailed and in-depth view of every inch of product, ensuring that every single product that leaves the factory is as good as the last.
- Categories / Tags
- 1024...SR
- AEMT
- AESL
- Acceleration
- Agriculture
- Agritech
- Autoclave
- BHS
- BHT
- BHx
- BLDC
- BP4
- BRC Series
- BX4
- BXT
- BeBionic
- Bearings
- Bespoke
- Brushed
- Brushed DC Motors
- Brushless
- Brushless DC Motors
- Brushless Dc Motors
- Brushless Motor
- Buhler
- Building Automation
- COVID
- CXR
- Catalogue
- Company Update
- Controller
- Coreless
- Coventry
- Custom
- Custom Design
- DC Motor
- DC Motor Supplier
- DMN
- Dc Motor
- Design
- Dimatech
- Drones
- EDS
- EMS
- EMS News
- EV
- Encoder
- Ewellix
- Exoskeleton
- Expo
- FAULHABER
- Factory
- Faulhaber
- Flat
- GPT
- Galil
- Gearhead
- IEF3
- IMC
- Industry 4.0. Blog
- Inspection
- KAG
- LL06
- LM
- LVC
- Laboratory Automation
- Linear
- Linear Actuator
- Logistics
- M50
- M80
- MC3
- Maintenance
- Manufacturing
- Mechatronics
- MedTech
- Medical
- Medical Devices
- Medical Imaging
- Medtech
- Merkel
- Motion Control
- Motor
- Neurosurgery
- New
- Nidec
- Nidec Servo
- Optical
- Pain Relief
- Piezo
- Piezomotor
- Pipeline
- Planetary
- Planetary Gearheads
- Point Of Care
- Precision
- Precistep
- Process
- Production
- Quickshaft
- Robot
- Robotics
- Robots
- SKF
- SR Series
- Samples
- Small DC Motor
- Software
- Space
- Sponsorship
- Stepper
- Stepper Motor
- Stepper Motors
- TMS
- Testing
- Trade Show
- 1016
- 1660
- 1935
- 2017
- 2018
- 2020
- 2021


